How To Make Built-In Bunk Beds: A Step-by-Step Guide
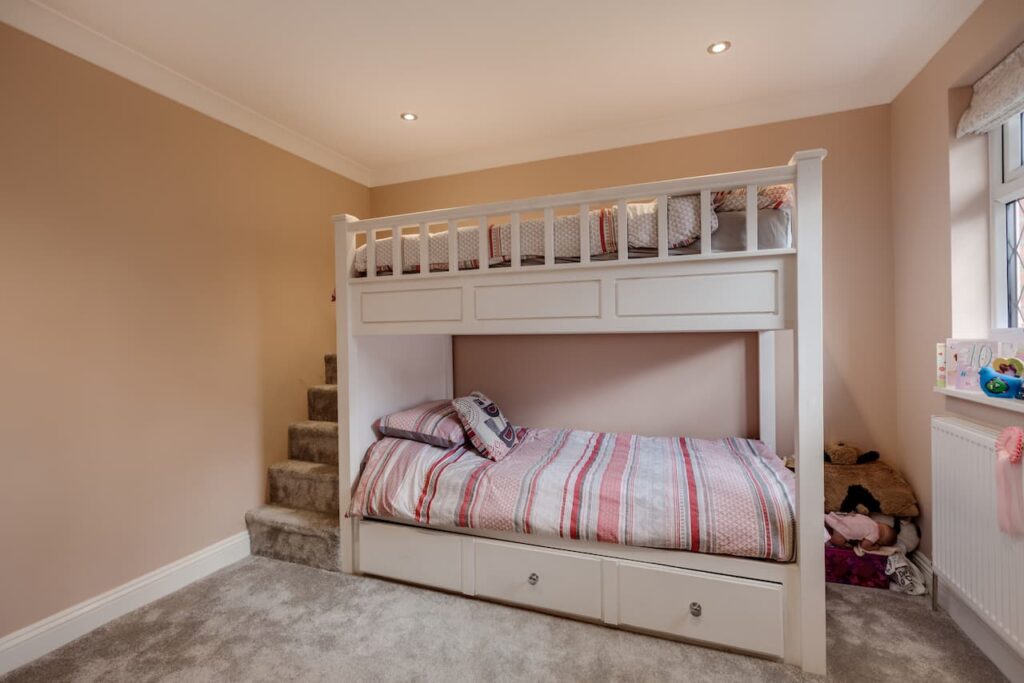
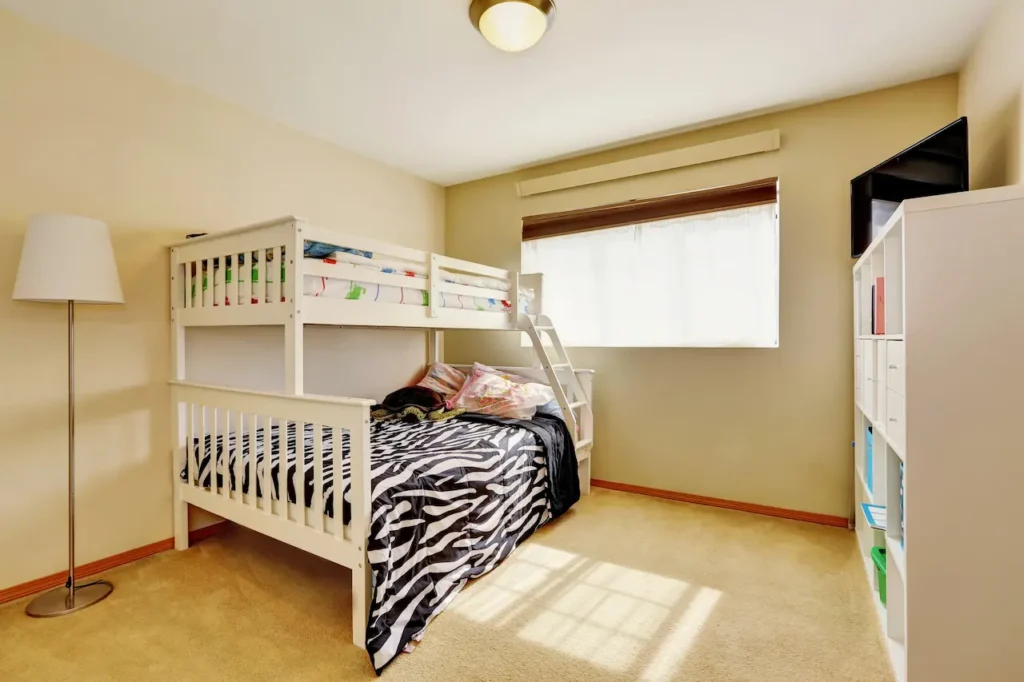
We’re thrilled to share our latest project—the built-in bunk beds we completed in the bunk room of our beach house! Thanks to our DIY approach, this tiny room, measuring just 7 feet wide, is home to two XL twin mattresses. These custom-built bunks provide a cozy sleeping space and quickly become a favourite hangout for the kids. They love spending time playing, reading, and even lounging here, making this small space feel like a multi-functional area.
When we started this project, I have to admit, I was a bit nervous. Building something as substantial as a bunk bed felt a little more intimidating than creating something like a bookcase or table. After all, we’re talking about a structure where one person will sleep on top of another—a bit more complicated than your average piece of furniture! But here’s the good news: this plan turned out to be much sturdier than I expected, and surprisingly easy to pull off.
So, if you’re ready to tackle your built-in bunk beds, follow along with these detailed steps to create a secure, functional, and stylish set of bunks for any small room!
The Key Steps in Building Built-In Bunk Beds:
Here’s a brief overview of what we’ll cover in this guide:
- Building the bottom bunk platform
- Securing the floating top bunk platform
- Choosing the height and spacing for the bunks
- Installing a ladder and railing
- Adding trim and moulding to make the beds look built-in
Our goal was to make this room both functional and fun, so we maximized the space and made the best use of the dimensions. The room is 81 inches wide, which makes it the perfect size for two side-by-side XL twin mattresses. But during the renovation, the space was still just a blank slate—nothing like the cozy little room it is now.
Materials and Supplies You’ll Need:
Before you start, make sure you have all the necessary materials. Here’s a list of what we used to create the custom-built-in bunk beds:
- 2×4” boards
- 1/2″ plywood panels (for the tops of the platforms)
- 1/8″ plywood panels (for the underside of the top platform)
- Primed 1×8” boards
- 2×2” pine boards (for the railing and ladder)
- Primed lattice strips
- Baseboard (can reuse existing baseboard)
- 4” and 5” structural screws
- Miter saw
- Circular saw
- Power drill
- Nail gun
- Stud finder
- Bar clamps
- Pocket hole jig (optional)
- Long levels
Step 1: Build The Bottom Bunk Bed Platform
We started by building the first mattress platform directly on the floor. Initially, this gave us the most headroom, which was important for both the top and bottom bunks. However, after further consideration, we decided to raise the bottom bunk a few inches off the floor for aesthetic reasons, allowing room for the baseboard trim.
We began by creating a frame using 2×4” boards. First, we cut the back and side pieces to the exact measurements needed to fit the space. Then, we added cross braces under the platform, spaced about 12 inches apart. These braces added support and kept the platform sturdy.
To secure the pieces, I used a Kreg Jig to make pocket holes, which allowed me to join the pieces tightly and securely. If you don’t have one yet, I highly recommend it—it’s a fantastic tool for projects like this!
After the frame was complete, we added a 1/2” plywood surface for the mattress. We cut the plywood to size with the circular saw, then nailed it in place.
As mentioned, we later decided to lift the platform slightly off the floor. To do this, we removed the frame and reattached it to the wall a few inches higher. Then, we added 2×4” legs underneath to raise it and installed a 2×2” board along the front to create a surface for attaching the baseboard.
Step 2: Choose The Height for Your Top Bunk
Before constructing the top bunk platform, we needed to determine the ideal height for it. With a standard 8-foot ceiling in the room, we had to balance headroom for both bunks and provide enough clearance for an adult to sit up comfortably on the bottom bunk.
Our goal was to:
- Have equal headroom on both bunks
- Allow enough space for an adult to sit up without hitting their head on the bottom bunk (important for bedtime stories!)
- Keep the top bunk low enough to discourage horseplay and jumping
To achieve this, we decided to place the top bunk slightly higher than halfway up the wall. This gave us more headroom on the lower bunk, which worked out perfectly for both the kids and any adults who might need to sit there.
Step 3: Build the Floating Top Bunk Platform
Building the floating top bunk required a bit more effort, as we had to ensure that it was securely attached to the walls without the use of vertical supports or legs. To do this, we used heavy-duty structural strength screws directly into the wall studs. These screws are incredibly strong and much easier to install than traditional lag screws, so they were perfect for this task.
We installed the top bunk platform in the same way we did the bottom bunk, but this time, we had to make sure it was secured firmly to the wall studs. Bar clamps helped hold everything in place while we tightened the screws.
Once the frame was attached, we secured 1/2″ plywood on top, just like the bottom bunk. This step was the perfect opportunity to test the strength and stability of the floating top bunk, and it passed with flying colours!
Step 4: Add Trim and Molding for a Built-In Look
With the structural work done, it was time to add the finishing touches. We wanted the bunks to have a built-in appearance, so we added some trim around the platforms. We used pre-primed 1×8” boards to create a clean, polished look on the front of the platform.
We also added thin 1/8″ plywood to the underside of the top bunk for a cleaner look from below. To frame the edges of the plywood, we used lattice strips, which were secured in place with wood glue and nails.
Finally, we reinstalled the baseboard across the back wall, placing it in front of the bottom bunk. These small details transformed the beds from simple platforms into elegant, built-in features!
Step 5: Build the Ladder
To complete the bunks, we needed a ladder. We took inspiration from a design by Studio McGee for a clean-lined, modern ladder with a combination of wood and white elements. We decided to build the ladder using 2×2” square pine boards.
Each rung of the ladder was 18” wide, and we cut them in groups to ensure they were all the same size. To space the rungs evenly, we used scrap pieces of wood as spacers. The rungs were set 12 inches apart, providing a comfortable climb for kids.
After assembling the ladder, we added extra 2×2” pieces to the front of each rung to make them wider and more stable underfoot.
Step 6: Attach the Ladder & Build the Railing
With the ladder built, we clamped it in place and attached it to the frame using the same heavy-duty screws. We also began installing the railing for the top bunk.
The top rail was secured to the wall side of the ladder and a small vertical rail on the opposite side. The rails were fixed using the same structural strength screws, and we made sure to keep everything level and aligned.
Step 7: Stain the Ladder and Rails
We wanted the wood to match the warm tones of the room’s existing flooring, so we carefully tested different stain combinations. Our final mix involved a four-step process:
- Apply a pre-stain wood conditioner for a more even finish.
- Brush on Minwax Natural stain on the raw cut ends of the wood.
- Apply Minwax Puritan Pine stain to the rest of the wood.
- Add a final coat of Minwax Colonial Maple to achieve a slight reddish hue.
After staining, the wood had a beautiful, rich colour that worked perfectly with the rest of the room’s decor.
Step 8: Add Mattresses and Bedding!
Finally, after all the woodwork was finished and the stain was dry, we added the mattresses and bedding to complete the look. The kids couldn’t wait to try out their new beds, and they were overjoyed when they saw the finished room!
We also added some additional storage for clothes and toys, using a small cube organizer shelf. This provided plenty of space for their belongings, making the room even more functional.
Final Measurements for Our Built-In Bunk Beds:
For those of you planning a similar project, here are the final measurements for our built-in bunks:
- Both platforms: 81.5 x 40” (to accommodate an 80 x 38” twin XL mattress)
- Bottom bunk: The top of the platform is 10” off the ground, with 34.5” of headheadroomop bunk: The top of the platform is 56” off the ground, with 32.5” of headroom
- Ladder rungs: 18” wide, 12” apart
Conclusion
Overall, the process of building these built-in bunk beds was much easier than we initially thought. The project was less nerve-wracking than expected, and we’re thrilled with how everything turned out. These bunks are not only functional but have transformed a small space into a cozy, stylish retreat for the kids.
Looking ahead, we may even build more sets of these beds for other spaces in our home—maybe even in our duplex! If you’ve been thinking about tackling a similar project, I say go for it! With the right materials, tools, and a little patience, you can create something both beautiful and practical that your family will enjoy for years to come.